우리집은 ‘돈이 사라지는 감각’부터 가르쳤습니다
저는 아이에게 돈을 가르칠 때 나름의 원칙이 있었습니다. 남는 자산과 사라지는 소비를 구분하는 것입니다.
게임 아이템, 콘텐츠 결제, 오락실, 인형 뽑기처럼 손에 남는 게 없는 ‘소모성·무형 지출’은 되도록 현금으로만 쓰게 했습니다. 지갑에서 지폐가 줄어드는 걸 눈으로 보게 해서, “이건 한 번 쓰면 돌아오지 않는 돈”이라는 감각을 몸에 익히게 하려는 거였죠.
이렇게만 적으면 꽤 깐깐한 부모처럼 보일지도 모르겠습니다. 하지만 저는 게임이나 아이템 구매 자체를 막는 부모는 아닙니다. 제 통제 안에서 아이에게 게임 아이템을 사준 적도 여러번 있습니다. 제가 아직 이르다고 보는 건 딱 하나, ‘아이가 마음대로 사는 것‘입니다.
그런 제가, 아이 전용 카드라는 ‘퍼핀’에서 게임 머니를 파는 것을 보고 놀랬습니다.
퍼핀은 ‘금융교육’을 표방하는 카드입니다
퍼핀은 레몬트리가 만든 7~18세 대상 선불충전카드입니다. 부모가 충전한 만큼만 쓰고, 부모가 한도를 정하고 사용 내역을 보며 관리할 수 있습니다. 회사는 “아이에게 개인금융을 가르쳐 경제적 독립을 앞당긴다”는 미션을 내세웁니다.
즉 퍼핀의 정체성은 ‘안전한 금융교육 도구’입니다. 그래서 더 묻게 됩니다.
그런데, 그 카드가 게임 머니를 ‘판다’는 것

여기서 제가 짚고 싶은 핵심은 이것입니다. 퍼핀은 단순히 아이가 어딘가에서 게임 머니를 사는 걸 ‘허용’하는 결제 수단에 그치지 않습니다. 퍼핀이라는 교육 플랫폼이, 자기 안에서 게임 머니를 직접 상품으로 진열하고 판다는 점입니다.
이 둘은 전혀 다릅니다. 아이가 자기 용돈으로 바깥 가게에서 게임 아이템을 사는 것과, ‘아이에게 올바른 금융 습관을 가르친다’는 앱이 게임 머니를 메뉴에 올려 파는 것은 의미가 다릅니다. 후자에는 “이건 사도 괜찮은 것”이라는 암묵적 권유가 깔리기 때문입니다.
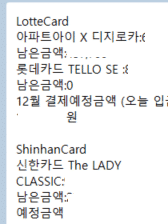
게다가 제가 본 방식은 그냥 상시 판매도 아니었습니다. 예약 판매였습니다. 미리 주문을 받아 두고 정해진 날 결제하는 방식이죠. 이건 수동적으로 ‘결제만 받아주는’ 것을 넘어, 기획해서 판매를 밀어 주는 행위에 가깝습니다.
더 마음에 걸리는 건 그 판매가 항상 열려 있지도 않다는 점입니다. 마치 팝업 스토어처럼 ‘지금만’ 살 수 있게 열렸다가, 시간이 지나면 그 판매 화면 자체가 사라져 다시 보이지 않습니다. 이건 우연이 아니라 잘 알려진 영업 기법입니다. ‘지금 아니면 못 산다’는 조급함을 자극하는 한정 판매죠. 어른을 상대로도 충동구매를 끌어내려고 쓰는 방식인데, 그 대상이 충동 조절이 더 어려운 아이라면 이야기가 다릅니다. 천천히 따져보고 부모와 의논할 시간을 주기는커녕, 반대로 서두르게 만드는 구조이기 때문입니다.
금융교육을 표방하는 브랜드가 하필 게임 머니를, 그것도 이렇게 조급함을 부추기는 방식으로 파는 것이 그 미션과 어울리는 일인지 의문입니다.
게임 머니는 아이에게 ‘가장 통제가 필요한’ 소비입니다
게임 머니가 다른 소비와 똑같다면 이런 문제 제기를 하지 않았을 겁니다. 하지만 게임 머니는 충동·중독성이 가장 강한 소비 항목 중 하나입니다. 어른조차 게임 과금은 스스로 통제하기가 쉽지 않습니다.
그래서 우리 사회는 미성년자의 게임 결제에 별도의 안전장치를 두어 왔습니다. 부모 동의 없는 미성년자의 결제는 원칙적으로 취소할 수 있고, 온라인 게임은 청소년 월 결제 한도를 두는 식이죠. 그만큼 ‘아이가 게임에 쓰는 돈’은 사회가 따로 조심해 온 영역이라는 뜻입니다.
그런데 정작 ‘아이 전용’, ‘금융교육’을 내건 카드가 그 항목을 앞장서서 판다면, 방향이 거꾸로 가는 것 아닐까요. 금융교육이라면 오히려 “이런 소비는 한 번 더 생각하자“고 가르쳐야 할 대상을, 상품으로 권하고 있는 셈입니다.
‘예약 판매’와 ‘오후 2시 취소’라는 구조
판매 방식에서 가장 마음에 걸렸던 부분은 취소 구조입니다. 제가 겪은 흐름은 이랬습니다.
- 미리 예약 판매를 받아 둡니다.
- 월요일 아침(8~9시쯤)에 결제가 이루어집니다. 이때 비로소 부모가 인지할 수 있습니다.
- 그런데 취소는 그날 오후 2시까지 보호자가 직접 요청해야 합니다.
문제는 그 시간대입니다. 오후 2시면 아이는 학교에 있는 시간입니다. 결국 부모는 아이와 상의할 틈도 없이, 혼자 짧은 시간 안에 결정해야 합니다. 의도가 무엇이든, 결과적으로 ‘부모와 자녀가 함께 판단하는 과정’을 건너뛰게 만드는 구조처럼 보입니다.
저는 의사결정 자체가 나쁘다고 말하는 게 아닙니다. 오히려 반대입니다. 금융교육이 목적이라면, 이런 소비야말로 아이와 함께 “이거 정말 살까?”를 이야기해 볼 가장 좋은 기회입니다. 그 대화의 창을 닫아 버리는 듯한 타이밍 설계가 아쉽습니다.
“용돈 한도 안이라 괜찮다”는 답으로 충분할까요

이 문제를 제기했을 때 돌아온 답의 취지는 “아이에게 책임이 주어진 용돈 한도 안에서 쓴 것이라 괜찮다“는 것이었습니다.
법적으로 근거가 아예 없는 말은 아닙니다. 민법은 부모가 범위를 정해 처분을 허락한 재산은 미성년자가 스스로 쓸 수 있다고 봅니다. 한도·실시간 알림·취소 창구를 제공하는 점도, 통제 없는 외부 결제보다는 분명히 안전장치가 많습니다.
그런데 그게 면죄부가 되지는 않는다고 생각합니다. 핵심은 “한도 안에서 썼느냐”가 아니라 “교육을 표방하는 플랫폼이 그 항목을 직접 파는 게 맞느냐“이기 때문입니다. “용돈 한도 안이라 괜찮다”는 답은, 가장 조심해야 할 소비에 대한 책임을 개별 용돈 한도 뒤로 미뤄 두는 답변으로 들립니다. 한도는 부모가 정한 것이지, 회사가 무엇을 파느냐에 대한 정당화가 될 수는 없습니다.
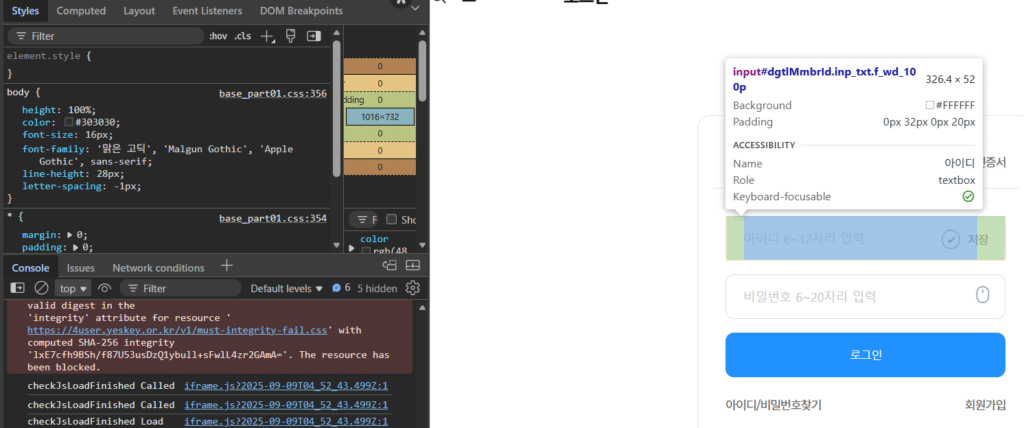
한 가지 덧붙이자면 — ‘핀번호’라는 형태
곁가지로 한 가지만 짚겠습니다. 게임 머니가 양도·환전이 자유로운 핀(PIN) 번호 형태라면 우려는 더 커집니다. 통신사조차 청소년에게는 데이터 선물을 막아 두는데, 핀번호는 그보다 더 현금에 가깝게 거래될 수 있기 때문입니다. 다만 이건 부차적인 논점이고, 제가 정말 묻고 싶은 건 형태 이전에 ‘게임 머니를 미성년자에게 파는 것 자체‘입니다.
교육이라는 간판을 떼든지, 게임 머니를 내리든지
정리하겠습니다. 저는 아이의 자율성에 반대하는 부모가 아닙니다. 제 통제 아래에서 게임 아이템을 사준 적도 있습니다. 문제는 자율성이 아니라, 금융교육을 내건 플랫폼이 충동성이 가장 큰 소비를 직접 상품으로 진열하고, ‘지금만 산다’는 한정 판매로 조급함까지 부추긴다는 것입니다.
그렇게 서두르게 만들어 놓고, 정작 부모가 들여다볼 시간은 어정쩡하게 잘라 둡니다. 사라고 재촉할 때는 적극적이면서, 다시 생각할 시간 앞에서는 인색한 셈입니다. 그러면서 “용돈 한도 안이라 괜찮다”는 말로 책임을 비껴갑니다. 한도는 부모가 정한 것이지, 회사가 무엇을 파느냐에 대한 변명이 될 수 없습니다.
저는 묻고 싶습니다. 이게 아이를 위한 교육입니까, 아니면 아이를 향한 영업입니까. 둘은 같이 갈 수 없습니다. ‘아이에게 돈을 가르친다’는 간판을 내걸 거라면 게임 머니부터 내려야 하고, 게임 머니를 계속 팔 거라면 교육이라는 간판을 떼는 게 정직합니다. 적어도 게임 머니 같은 항목은 부모가 건건이 직접 승인하게 하고, 부모가 충분히 검토할 시간을 보장하는 것 — 이건 양보할 수 없는 최소한입니다.
아이의 지갑을 노리는 어른은 이미 세상에 충분히 많습니다. 적어도 ‘아이 전용’이라는 이름을 단 카드만큼은, 그 줄에 서지 않기를 바랍니다.
참고
- 퍼핀/레몬트리 공식 소개: https://www.firfin.family/
- 청소년 게임 현금결제 관련 보도: https://www.jemin.com/news/articleView.html?idxno=637810
- 통신사 데이터 선물 청소년 제한(SKT, 참고): https://www.tworld.co.kr/poc/html/product/TS3.4.4.html